Papasan Chair Cushion Cover Tutorial - 54" diameter
Just about everyone I know has a papasan chair. These chairs are sometimes called mamasan or bowl chairs. Most people I know also have a few cushions that they can't use anymore -- including me!
After a few years of the white papasan chair in our living room being occupied by my lovable pooch, it started to take on a funky, dingy look. White's an unfortunate color for any furniture, in my opinion, especially around here with our red clay.
I tried using the carpet cleaner and then tried stuffing it into an industrial washer to no avail. Rather than throw away the cushion (which now smelled delightfully of citrusy detergent), I decided to make a slip cover. I'm not a skilled seamstress and have spatial issues, so this was to be quite an undertaking, or so I thought.
My first step was to decide on fabric. I wanted something extremely heavy duty, since it will need to be laundered frequently, but didn't want to spend the $14/yd for it. Then I thought about drop cloths. They're heavy duty, washable, and were the perfect color to match with the rest of our furniture (cream!! o_O). Even better, it cost $11 for one gigantic piece.
The dropcloth I used for this project was 9x12'.
The cushion I covered was 54” in diameter, from seam to seam. Flat across the top, it was 52”.
Upholstery thread and a heavy duty needle are recommended.
To start, I unfolded the dropcloth, leaving it folded once, hotdog style. I placed the cushion on the dropcloth about 1.5” from the folded side. I decided to leave both halves of the cushion connected to minimize cutting and sewing errors.
Then, I began marking out 1.5” around the entire cushion. The extra 1.5” provides plenty of sewing/seaming room and plenty of room for the cushion to fit securely inside. After marking out 1.5” all of the way around, I connected the dots to make cutting easier.
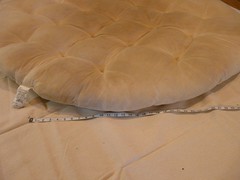
Because this cover was to be removable, I had to determine how wide to make the opening. You can do this by rolling your cushion and wrapping a measuring tape tightly around the widest part. For this cushion, it was 25”. I marked the opening at 22”. | 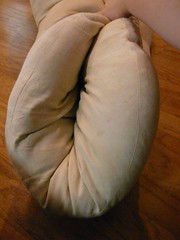 |
 Yes, EW! I had that showing in my living room!
| Lay the measuring tape along the edge of the cushion and mark twice to designate the opening. Measure 4.5” out from the cushion between the markings. These flaps will allow you to place buttons, velcro, or a zipper to close the cover. |
Cut out both circles, making sure not to separate the two layers. I left the cushion in place to keep them from wiggling quite so much and to provide extra guidance. Once you've cut out the layers, take them to your sewing machine or serger and sew all of the way around, using a honeycomb, zigzag, or overcast type stitch, excepting the flap area. | 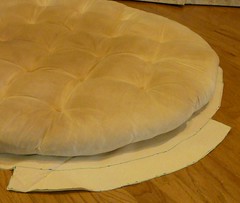 |
For the flaps, fold, press, or pin the edges over and sew down. To determine where to place your buttonholes or velcro, turn the cover right side out and put the cushion inside. Fold one flap over the edge of the cushion so that it lays directly against the cushion, under the cover on the opposite side. Take the other flap and fold it against the inside of the cover it's attached to. Hold the edges together and mark where they touch. Measure .5-1” in from there and attach your velcro or buttons.
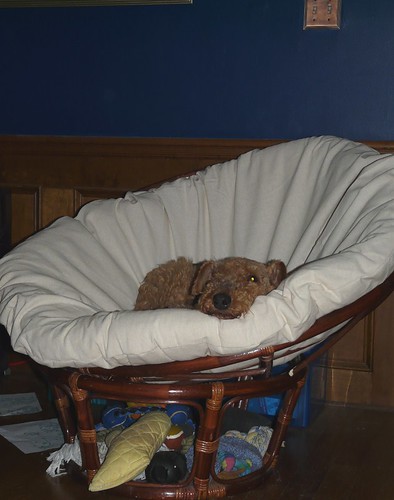
The finished product with it's primary denizen. And her toys underneath.
Once you get the pillow in the cover, it may take some finagling to get it flat. I recommend grabbing the cushion and flapping the whole thing a few times.